Month: February 2026

p-touch label maker manual

Category : Manuals

Article Plan: P-Touch Label Maker Manual

This manual details setup‚ operation‚ and troubleshooting for Brother P-Touch label makers‚ including models like PT-D460BT‚ PT-N25BT‚ and PT-D600․

Brother P-Touch label makers have become indispensable tools for organization in homes‚ offices‚ and businesses․ These devices offer a convenient and efficient way to create professional-looking labels for a multitude of applications‚ from simple address labels to complex organizational systems․

The P-Touch line encompasses a variety of models‚ catering to diverse needs and budgets․ Whether you require a basic‚ portable labeler or a more advanced‚ PC-connectable machine‚ Brother offers a solution․ The ability to connect via Bluetooth and utilize apps like iPrint&Label further enhances usability․

This guide will provide a comprehensive overview of P-Touch label makers‚ covering setup‚ operation‚ software utilization‚ and troubleshooting to maximize your labeling experience․

What is a P-Touch Label Maker?

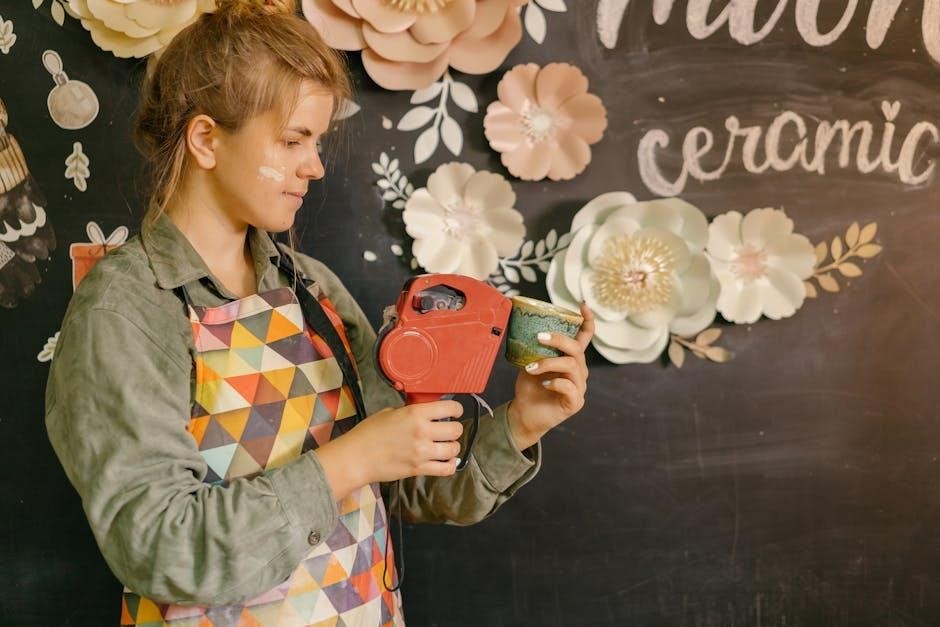
A P-Touch label maker is a compact electronic device designed to print labels on adhesive tape․ Utilizing thermal transfer technology‚ these makers don’t require ink cartridges‚ relying instead on heat to transfer images onto the tape․ Brother’s P-Touch series offers both handheld and desktop models‚ varying in features and connectivity․

These devices accept input via a built-in keyboard‚ or through software and mobile apps like P-touch Editor and iPrint&Label․ This allows for customized label creation with various fonts‚ symbols‚ and styles․ Models like the PT-D460BT offer PC connectivity for more complex designs․

Essentially‚ a P-Touch simplifies labeling tasks‚ providing durable and professional results․

Benefits of Using a P-Touch Label Maker

P-Touch label makers offer numerous advantages for home‚ office‚ and business use․ They provide a professional finish to labeling‚ enhancing organization and clarity․ Eliminating the need for handwritten labels saves time and ensures legibility‚ crucial for file management‚ storage‚ and product identification․

Connectivity options‚ like Bluetooth and PC connection (PT-D460BT‚ PT-D600)‚ expand design possibilities through software and apps․ Durable‚ laminated tapes resist fading‚ smudging‚ and moisture․ The ability to customize fonts‚ symbols‚ and templates allows for branded or uniquely styled labels․

Ultimately‚ P-Touch promotes efficiency and a polished appearance․

P-Touch Model Overview

Brother offers a diverse range of P-Touch label makers‚ including popular models like the PT-D460BT‚ PT-N25BT‚ and PT-D600‚ each with unique features․

Popular P-Touch Models (PT-D460BT‚ PT-N25BT‚ PT-D600)

The Brother PT-D460BT Business Expert Connected Label Maker stands out with its connectivity‚ allowing label creation via PC software and the iPrint&Label app․ It boasts a 30mm/s print speed and is ideal for office organization․ The PT-N25BT offers smartphone app integration alongside a built-in keyboard‚ providing flexibility for both home and small business use․

Finally‚ the PT-D600 is a PC-connectable model‚ offering users access to a library of templates and customization options through the P-touch Editor Label Design software․ These models represent Brother’s commitment to versatile and user-friendly labeling solutions‚ catering to diverse needs and preferences․

Key Features Comparison

Comparing the PT-D460BT‚ PT-N25BT‚ and PT-D600 reveals distinct strengths․ The PT-D460BT excels in connectivity‚ offering both PC software and mobile app support․ The PT-N25BT balances convenience with its integrated keyboard and smartphone app access‚ ideal for on-the-go labeling․ The PT-D600 prioritizes PC-based design‚ providing extensive customization through the P-touch Editor software and template library․

Print speed is consistent across models‚ but software features and connectivity options differentiate them․ Choosing depends on workflow – app-focused‚ PC-centric‚ or a blend of both‚ ensuring optimal labeling efficiency․

Choosing the Right Model for Your Needs

Selecting the ideal P-Touch model hinges on your primary labeling tasks․ For businesses needing extensive PC customization and template access‚ the PT-D600 is a strong choice․ The PT-D460BT suits users desiring seamless smartphone and computer integration‚ offering flexibility․ If portability and quick labeling are key‚ the PT-N25BT‚ with its app connectivity and keyboard‚ proves valuable․

Consider label volume‚ design complexity‚ and preferred connectivity․ Assess whether robust software or mobile convenience best aligns with your workflow for optimal results․

Setting Up Your P-Touch Label Maker

Initial setup involves powering on the device‚ installing batteries or the AC adapter‚ and correctly loading a compatible label tape cartridge․

Initial Setup and Powering On

Upon unboxing your P-Touch label maker‚ carefully remove all packaging materials․ Before first use‚ ensure the device is either powered by fresh batteries or connected to a suitable AC adapter – both options are generally supported․ To power on‚ locate the power button‚ typically clearly marked‚ and press it firmly․

The display screen should illuminate‚ indicating the device is active․ Some models may briefly display a welcome message or prompt for initial language and date/time settings․ Follow the on-screen instructions to complete these basic configurations․ Proper initial setup ensures optimal performance and accurate label creation from the start․

Installing Batteries or AC Adapter

To install batteries‚ locate the battery compartment‚ usually on the underside of the label maker․ Open the compartment cover and insert the required number of AA or AAA batteries‚ observing the correct polarity (+ and -) as indicated․ Ensure batteries are securely seated․ Alternatively‚ connect the AC adapter to the power port and plug it into a wall outlet․

Using the AC adapter is recommended for frequent use‚ as it conserves battery life and provides consistent power․ The device will automatically detect the power source․ Remove batteries if the label maker will not be used for an extended period to prevent leakage․

Loading Label Tape

Open the label cassette cover on your P-Touch label maker․ Insert the label tape cassette into the compartment‚ ensuring it clicks securely into place․ The tape should unwind smoothly from the roll․ Gently pull a small length of tape through the guide slot and around the print head․

Close the cassette cover․ The label maker is now ready to print․ Incorrect tape loading can cause jams or poor print quality․ Always use genuine Brother P-Touch tapes for optimal performance and to avoid damaging the print head․ Refer to your model’s specific diagram for correct orientation․

Using the P-Touch Editor Software

P-touch Editor allows for customized label design on your PC‚ offering templates‚ fonts‚ symbols‚ and graphics for professional-looking labels easily;

Downloading and Installing P-touch Editor

To begin utilizing the full design capabilities of your P-Touch label maker‚ downloading and installing the P-touch Editor software is essential․ This software is freely available from the official Brother support website․ Navigate to the support section and locate the downloads specifically for your P-Touch model – PT-D460BT‚ PT-N25BT‚ or PT-D600․

The download will typically be an executable file; once downloaded‚ double-click to initiate the installation process․ Follow the on-screen prompts‚ accepting the license agreement and choosing your preferred installation directory․ The installation may require a system restart to complete successfully․ Ensure your computer meets the minimum system requirements listed on the Brother website for optimal performance․

Navigating the P-touch Editor Interface

Upon launching P-touch Editor‚ you’ll encounter a user-friendly interface designed for efficient label creation․ The main window features a ribbon-style menu at the top‚ providing access to core functions like creating new labels‚ opening existing designs‚ and saving your work․ A central design area allows you to visualize and manipulate your label layout․

The left-hand panel typically houses font selection‚ style options‚ and symbol libraries․ Explore the extensive template library for pre-designed labels‚ or opt for a blank canvas to build a custom design․ Utilize the toolbar to adjust text size‚ alignment‚ and add graphical elements․

Creating Basic Labels with P-touch Editor

To begin‚ open P-touch Editor and select “New Label․” Input your desired text into the editing area․ Utilize the font and style options to customize the appearance – choose from various fonts‚ sizes‚ and colors․ Adjust text alignment (left‚ center‚ right) using the toolbar․

Explore adding symbols from the library to enhance your label․ Preview your label design before printing to ensure accuracy․ Select your P-Touch model and label tape size within the software settings․ Finally‚ click “Print” to send the design to your label maker for immediate output․

Using the iPrint&Label App

The iPrint&Label app enables label creation and printing directly from your smartphone via Bluetooth‚ offering convenience and flexibility for on-the-go labeling needs․

Downloading and Installing iPrint&Label

To begin using the iPrint&Label app‚ you’ll first need to download and install it on your smartphone or tablet․ The app is available for both iOS and Android devices․

Simply visit the App Store (iOS) or Google Play Store (Android) and search for “iPrint&Label․” Locate the official Brother International Corporation app and tap “Install․”

Once the download is complete‚ open the app․ You may be prompted to accept terms and conditions and grant necessary permissions‚ such as Bluetooth access․

Ensure your device’s Bluetooth is enabled before proceeding to the connection stage‚ as the app relies on this for communication with your P-Touch label maker․

Connecting to Your P-Touch via Bluetooth

With the iPrint&Label app installed and Bluetooth enabled on your device‚ you can now connect to your P-Touch label maker․ Open the app and follow the on-screen prompts to begin the pairing process․

The app will search for available P-Touch devices within Bluetooth range․ Ensure your label maker is powered on and in pairing mode – consult your specific model’s manual for instructions on activating pairing mode․

Once your P-Touch appears in the list‚ select it․ You may be asked to enter a pairing code (typically displayed on the label maker’s screen) or confirm a connection request․

A successful connection will be indicated within the app‚ allowing you to begin designing labels directly from your smartphone․

Designing Labels on Your Smartphone

Once connected via Bluetooth‚ the iPrint&Label app unlocks a world of label design possibilities directly on your smartphone․ The app offers a user-friendly interface with various templates‚ fonts‚ symbols‚ and graphics․

You can easily customize pre-designed templates or create labels from scratch‚ adjusting text size‚ style‚ and alignment․ The app allows you to preview your label design before printing‚ ensuring accuracy;

Utilize the app’s built-in library of symbols to add visual cues to your labels‚ or import images from your phone’s gallery․ Experiment with different font styles and sizes to achieve the desired look․

Save your frequently used designs for quick access‚ streamlining your labeling process․

Advanced Labeling Techniques

Explore P-touch Editor’s templates‚ symbols‚ and graphics for creative labels․ Customize fonts and styles to personalize your projects and enhance organization․

Using Templates in P-touch Editor

P-touch Editor offers a diverse library of pre-designed templates to streamline label creation․ These templates cover various categories‚ including address labels‚ file folders‚ CD/DVD cases‚ and price tags‚ saving you significant time and effort․

Users can easily browse the template library within the software and select a design that suits their needs․ Templates are fully customizable; you can modify text‚ fonts‚ sizes‚ and even add your own graphics or logos․

The newly-updated P-touch Editor Label Design software provides even more options‚ allowing users to quickly find and adapt templates for professional-looking labels․

Adding Symbols and Graphics

P-touch Editor empowers users to enhance labels with a wide array of symbols and graphics‚ boosting visual appeal and clarity․ The software includes a built-in library of pre-loaded symbols‚ covering common icons‚ warning signs‚ and decorative elements․

Beyond the built-in options‚ users can import their own images and logos to create truly customized labels․ Supported file formats typically include JPG‚ PNG‚ and BMP․

The newly-updated P-touch Editor Label Design software lets users choose from a library‚ or create custom labels using graphics already stored on their computer․

Customizing Fonts and Styles

P-touch Editor offers extensive font customization options‚ allowing users to tailor label appearance to specific needs․ Users can select from a variety of built-in fonts‚ adjusting size‚ boldness‚ and italics․ Furthermore‚ the software supports importing TrueType fonts (․ttf) from your computer‚ expanding the stylistic possibilities․

Beyond font selection‚ users can modify text color and style‚ including outlining and shadowing․

The newly-updated P-touch Editor Label Design software lets users create custom labels using the fonts‚ symbols and graphics already stored on their computer‚ offering diverse design options․

Troubleshooting Common Issues

This section addresses frequent problems like tape jams‚ connectivity errors (Bluetooth/PC)‚ and diminished print quality‚ providing solutions for a smooth labeling experience․

Tape Jams and Errors

Tape jams are a common frustration‚ often occurring due to incorrect tape loading or debris within the printer mechanism․ First‚ power off the P-Touch and carefully open the tape compartment․ Gently remove any torn tape pieces‚ ensuring no fragments remain․

Check the tape guides to confirm proper alignment; misaligned guides can cause jams․ If errors persist‚ inspect the print head for residue buildup – a clean print head is crucial․ Refer to the manual for specific error codes displayed‚ as these pinpoint the issue․ Avoid forcing the tape; gentle manipulation is key to preventing further damage․ Regularly cleaning the internal components minimizes jam occurrences․

Connectivity Problems (Bluetooth/PC)

Bluetooth connection issues often stem from pairing problems or signal interference․ Ensure Bluetooth is enabled on both your P-Touch and smartphone/computer․ Try “forgetting” the device and re-pairing it․ For PC connectivity‚ verify the USB cable is securely connected and the correct drivers are installed․

Download the latest P-touch Editor software from the Brother support website․ If problems continue‚ check for software updates or firewall settings blocking communication․ Restarting both devices can resolve temporary glitches․ Confirm compatibility between your P-Touch model and operating system․

Printing Quality Issues

Poor print quality can result from a dirty print head‚ incorrect label tape selection‚ or print density settings․ Regularly clean the print head with a soft‚ dry cloth as outlined in the manual․ Ensure you’re using Brother-genuine label tape compatible with your P-Touch model․

Adjust the print density within the P-touch Editor software or iPrint&Label app․ Experiment with different settings to achieve optimal clarity․ Check for obstructions within the label path․ If issues persist‚ try a different roll of tape to rule out tape defects․

Maintaining Your P-Touch Label Maker

Regular cleaning of the print head and timely battery replacements are crucial for optimal performance and longevity of your Brother P-Touch device․

Cleaning the Print Head

Maintaining a clean print head is essential for consistently high-quality labels․ Over time‚ residue from label tape adhesive can build up‚ causing faded or incomplete prints․ Brother recommends cleaning the print head after every tape roll change‚ or approximately every five hundred labels printed․

To clean‚ power off your P-Touch․ Open the label compartment and locate the print head․ Use a dry cotton swab lightly dampened with isopropyl alcohol to gently wipe the entire surface of the print head․ Avoid applying excessive pressure․ Allow the print head to dry completely before inserting a new tape roll and resuming operation․ Never use metal objects or abrasive cleaners‚ as these can damage the delicate print head․

Replacing Batteries

When your P-Touch label maker displays a low battery indicator‚ it’s time for a replacement․ Most models require six AAA or AA alkaline batteries‚ depending on the specific model․ Ensure you use high-quality alkaline batteries for optimal performance and longevity․ Avoid mixing old and new batteries‚ or different battery types․

To replace‚ locate the battery compartment (usually on the bottom or back of the device)․ Open the compartment and remove the old batteries‚ noting the correct polarity (+ and -)․ Insert the new batteries‚ matching the polarity markings․ Close the compartment securely․ Proper battery disposal is crucial; follow local regulations for recycling․

Resources and Support

Brother provides extensive support‚ including their official website‚ detailed online manuals‚ frequently asked questions‚ and active community forums for P-Touch users․

Brother Support Website

The official Brother Support website is the primary hub for all P-Touch label maker assistance․ Here‚ users can find a wealth of resources tailored to their specific model․ This includes downloadable drivers and software updates for programs like P-touch Editor‚ ensuring optimal performance and compatibility․

Detailed troubleshooting guides address common issues‚ such as tape jams‚ connectivity problems‚ and printing quality concerns․ You’ll also discover comprehensive FAQs answering frequently asked questions․ Furthermore‚ the website offers access to product registration‚ warranty information‚ and contact details for direct support from Brother’s customer service team․

Online Manuals and FAQs

Brother provides extensive online manuals for each P-Touch label maker model‚ offering in-depth instructions on every feature and function․ These digital manuals are easily searchable‚ allowing users to quickly find solutions to specific questions․ Complementing the manuals is a robust collection of Frequently Asked Questions (FAQs)․

The FAQs address common setup issues‚ software navigation‚ label design tips‚ and troubleshooting steps․ These resources are designed to empower users to resolve problems independently․ Accessing these materials doesn’t require registration and is available 24/7‚ providing immediate assistance whenever needed․ They are a valuable first step before contacting support․

Community Forums and Tutorials

Beyond official Brother support‚ a thriving online community exists for P-Touch label maker users․ These forums serve as platforms for sharing tips‚ tricks‚ and solutions to common challenges․ Users can connect with fellow enthusiasts‚ ask questions‚ and receive advice from experienced label makers․

Numerous video tutorials are also available on platforms like YouTube‚ demonstrating advanced labeling techniques‚ software features‚ and troubleshooting procedures․ These visual guides can be particularly helpful for understanding complex processes․ These resources offer a collaborative learning environment‚ supplementing the official documentation and providing real-world insights․


manual toro tmc 212

Category : Manuals

Toro TMC-212 Manual: A Comprehensive Overview (February 17, 2026)

Today, February 17, 2026, access a 44-page Toro TMC-212 User Guide in PDF format, alongside Aqua Matic resources and French manuals for automated irrigation․

The Toro TMC-212 represents a significant advancement in automated irrigation control, offering users a robust and programmable solution for efficient water management․ As of today, February 17, 2026, comprehensive documentation, including a 44-page user guide available in PDF format, supports this system․ This guide, alongside resources for the Aqua Matic system, empowers users to fully utilize the TMC-212’s capabilities․

Furthermore, a French language manual is also accessible, broadening the system’s usability․ The availability of these resources underscores Toro’s commitment to providing accessible support․ Understanding the TMC-212’s features and functionalities, as detailed in these manuals, is crucial for optimal performance and long-term system preservation․ These documents are vital for both initial setup and ongoing maintenance․

What is the Toro TMC-212?

The Toro TMC-212 is a sophisticated irrigation controller designed for both residential and light commercial applications․ Detailed within the readily available 44-page user manual (in PDF format, as of February 17, 2026), it functions as the central hub for automating watering schedules․ It integrates seamlessly with the Aqua Matic system, offering enhanced control and efficiency․

Beyond the English guide, a French manual caters to a wider user base․ The TMC-212 isn’t merely a timer; it’s a programmable system capable of adapting to varying weather conditions and landscape needs․ Understanding its core functionalities, as outlined in the provided documentation, unlocks its full potential for water conservation and landscape health․

Key Features and Specifications

The Toro TMC-212, detailed in its 44-page user manual (PDF accessible as of February 17, 2026), boasts programmable timer functionality central to its operation․ It’s designed for integration with the Aqua Matic system, enhancing automated irrigation control․ Key features include customizable watering schedules and adaptability for diverse landscape requirements․

While specific technical specifications aren’t explicitly detailed in the provided snippets, the documentation suggests a focus on user-friendly programming and reliable performance․ The availability of both English and French manuals indicates a broad market reach․ Further details regarding zone control, voltage requirements, and operational limits are found within the complete user guide․

Understanding the TMC-212 System

The Toro TMC-212 integrates with Aqua Matic, offering programmable timing and, potentially, monitoring capabilities as suggested by related research documentation available online․

Aqua Matic System Integration

The Toro TMC-212 is designed for seamless integration with the Aqua Matic irrigation system, enhancing automated watering control․ Available documentation, including the Aqua Matic Owner Manual V2․05a (June 2006), details this compatibility․ This integration allows users to leverage the Aqua Matic’s established features alongside the TMC-212’s programmable timer functionality․

Specifically, the TMC-212 acts as a controller, managing the Aqua Matic valves and zones․ Understanding the Aqua Matic’s wiring and zone configurations is crucial for successful setup․ The user guide provides insights into connecting the TMC-212 to the Aqua Matic system, ensuring efficient and reliable operation․ Proper integration maximizes water conservation and optimizes landscape health through precise scheduling․

Programmable Timer Functionality

The Toro TMC-212 boasts robust programmable timer functionality, central to its automated irrigation control․ This feature allows users to customize watering schedules based on specific landscape needs․ The 44-page user guide details how to set start times, durations, and frequencies for each irrigation zone․

Users can program multiple schedules to accommodate varying seasonal requirements or plant types․ The timer’s flexibility extends to independent zone control, enabling tailored watering for different areas of the landscape․ Mastering the timer’s programming interface, as outlined in the manual, is key to achieving optimal water usage and promoting healthy plant growth․

Electrical Oscillations & System Monitoring (Related Research)

While the Toro TMC-212 manual primarily focuses on operational instructions, related research explores electrical oscillations within the brain, specifically near the Rolandic fissure․ Studies, like those concerning gait patterns in children with cerebral palsy, utilize cluster analysis and monitor physiological signals․

Though seemingly disparate, this research highlights the importance of precise signal monitoring and analysis – principles applicable to understanding the TMC-212’s electrical components and system performance․ Further investigation into sensory modulation via endogenous rhythms could potentially inform future irrigation control systems, optimizing efficiency based on environmental factors․

Setting Up Your Toro TMC-212

Begin with initial installation, connecting to a water source, and then program basic timer settings using the provided Toro TMC-212 manual for optimal performance․

Initial Installation Procedures

Carefully unpack your Toro TMC-212 and verify all components are present, referencing the included parts list within the user guide․ Select a suitable location for the controller, sheltered from direct weather exposure, yet easily accessible for programming and maintenance․ Ensure the location is near a grounded electrical outlet, as the TMC-212 requires power for operation․

Mount the controller securely to a wall or post using appropriate hardware – not supplied․ Before connecting any wiring, thoroughly review the wiring diagrams detailed in the manual․ Improper wiring can cause system malfunction or damage․ Pay close attention to polarity and wire gauge recommendations․ Double-check all connections before proceeding to the next step, ensuring a robust and reliable installation․

Connecting to Water Source

Prior to connecting the Toro TMC-212 to your water supply, completely shut off the main water valve․ This prevents accidental flooding during installation․ Locate the inlet connection on the TMC-212 controller and carefully attach the appropriate piping, ensuring a watertight seal using Teflon tape or pipe dope․

Connect the valve wires according to the wiring diagram in the manual, paying close attention to the common and zone terminals․ Verify all connections are secure and properly insulated․ Slowly turn the main water valve back on, checking for any leaks at the connections․ If leaks are detected, immediately shut off the water and re-tighten the fittings․

Programming the Timer – Basic Settings

Initial timer programming involves setting the current time and date on your Toro TMC-212․ Access the programming mode by pressing the “Program” button, then navigate using the arrow keys․ Input the correct time, ensuring AM or PM is accurately selected․ Next, set the date following the displayed format․

Configure the start time for your watering schedule, defining when the first zone will activate․ Specify the watering duration for each zone, measured in minutes․ Finally, select the days of the week for irrigation, choosing from options like daily, specific weekdays, or interval settings․ Save your settings to activate the schedule;

Troubleshooting Common Issues

Resolve typical problems with your Toro TMC-212, including watering schedule errors and electrical concerns, using this guide for optimal system performance․

Identifying Common Problems

Initial diagnostics for the Toro TMC-212 often center around the Aqua Matic system․ Users frequently encounter issues with incorrect time settings or a complete lack of programmed schedules activating․ A common problem involves the timer failing to initiate watering cycles, potentially due to a depleted battery or a disconnected power source․

Electrical malfunctions can manifest as unresponsive displays or erratic valve operation․ Inspect wiring connections thoroughly․ Furthermore, ensure the unit is receiving adequate power․ Review the user guide (PDF available online) for specific error codes displayed, as these pinpoint the source of the issue․

Finally, confirm proper sensor functionality, if applicable, as faulty sensors can prevent scheduled watering․ Remember to consult online support forums for shared experiences and solutions․

Resolving Watering Schedule Errors

Correcting schedule errors on the Toro TMC-212 begins with verifying the programmed start times and durations․ Ensure these align with your desired watering plan, referencing the user manual (PDF) for detailed instructions․ If schedules aren’t running, confirm the timer isn’t in “Manual” override mode․

Inspect the Aqua Matic system integration; conflicts here can disrupt programmed cycles․ Double-check date and time settings, as inaccuracies will cause scheduling failures․ Utilize the programmable timer’s reset function if settings are severely corrupted․

Online support forums often provide solutions for specific error scenarios․ Remember to save any changes made to the timer’s programming to ensure they are implemented․

Addressing Electrical Issues

Troubleshooting electrical problems with the Toro TMC-212 requires caution․ First, verify the power supply to the unit – check the circuit breaker or fuse․ If power is confirmed, inspect wiring connections for looseness or corrosion, consulting the user manual’s diagrams․

Electrical oscillations, though related to broader research, aren’t a typical user-level concern; focus on visible connections․ A lack of display illumination suggests a power supply failure within the unit itself․

Do not attempt internal repairs without proper electrical knowledge․ Contact Toro customer service for assistance, referencing the model number․ Disconnect power before any inspection to prevent electrical shock․

Maintenance and Care

Proper winterization, cleaning, and storage are crucial for Toro TMC-212 longevity, ensuring reliable operation for your automated irrigation system each season․

Winterization Procedures

Preparing your Toro TMC-212 for colder months is essential to prevent damage from freezing temperatures․ Begin by disconnecting the water supply to the controller, ensuring no residual water remains in the system․ Thoroughly flush all irrigation lines by activating each zone briefly; this removes standing water that could freeze and cause cracks or breaks․

Next, locate and open the manual drain valve on the TMC-212 unit, allowing any remaining water within the controller itself to drain completely․ Inspect all connections for leaks and tighten as needed․ Consider removing the controller from its outdoor mounting location and storing it indoors in a dry, protected environment․ Finally, ensure the backflow preventer is also winterized according to local plumbing codes to safeguard your water supply․

Cleaning and Storage

Maintaining a clean Toro TMC-212 extends its lifespan and ensures optimal performance․ Regularly wipe down the exterior of the controller with a damp cloth to remove dust, dirt, and debris․ Avoid using harsh chemicals or abrasive cleaners, as these can damage the unit’s finish․ Inspect the wiring connections periodically for corrosion or loose connections, addressing any issues promptly․

When storing the TMC-212 for extended periods, such as during the off-season, disconnect it from the power source and ensure it is completely dry․ Store the unit in a cool, dry location, protected from direct sunlight and extreme temperatures․ Keep the original packaging if available, or use a protective container to prevent physical damage during storage․

Long-Term System Preservation

Ensuring the longevity of your Toro TMC-212 requires proactive measures beyond basic cleaning and storage․ Regularly review the programming schedule and adjust settings as needed to reflect changing seasonal watering requirements․ Monitor the system for any signs of wear and tear, such as cracked wiring or damaged components, and replace them promptly․

Consider implementing a preventative maintenance schedule, including annual inspections of the entire irrigation system connected to the TMC-212․ This will help identify and address potential issues before they escalate into costly repairs․ Proper documentation of maintenance activities and system settings will also aid in long-term preservation and troubleshooting․

Advanced Features & Settings

Explore rain delay options, seasonal adjustments, and manual override procedures within the Toro TMC-212’s programming interface for optimized irrigation control and flexibility․

Rain Delay Functionality

The Toro TMC-212’s rain delay feature is a crucial component for water conservation and efficient irrigation management․ This advanced setting allows users to temporarily suspend scheduled watering cycles when natural precipitation occurs, preventing overwatering and promoting healthy plant growth․ Activation is typically straightforward, often involving a dedicated button or menu option within the timer’s interface․

Users can usually specify the duration of the rain delay, ranging from hours to several days, depending on the forecasted weather conditions․ The system will automatically resume the programmed watering schedule once the specified delay period has elapsed․ Proper utilization of this feature not only saves water but also reduces the risk of fungal diseases and other water-related plant problems․ Refer to the user manual for specific instructions tailored to your TMC-212 model․

Seasonal Adjustment Options

The Toro TMC-212 incorporates seasonal adjustment options, enabling users to fine-tune watering schedules based on changing weather patterns throughout the year․ As temperatures rise during warmer months, increased watering may be necessary to compensate for higher evaporation rates․ Conversely, during cooler, wetter seasons, reducing watering frequency is essential to prevent over-saturation․

These adjustments are typically expressed as a percentage increase or decrease of the baseline watering duration․ For instance, a 25% increase might be applied during peak summer, while a 50% reduction could be used in the fall․ Utilizing these features optimizes water usage and ensures plants receive the appropriate amount of hydration regardless of the season․ Consult the TMC-212 manual for detailed guidance on implementing seasonal adjustments effectively․

Manual Override Procedures

The Toro TMC-212 offers manual override functionality, allowing users to initiate or halt watering cycles independent of the programmed schedule․ This feature proves invaluable for responding to unexpected weather events, such as sudden rainfall, or addressing specific plant needs requiring immediate attention․ Typically, a dedicated “Manual” button or menu option activates this mode․

Upon activation, the system bypasses the timer settings, enabling direct control over the watering valves․ Users can select which zones to water and for how long․ It’s crucial to remember to deactivate manual override once the immediate need is addressed, restoring the system to its automated schedule․ Refer to the TMC-212 manual for precise instructions on utilizing the manual override function․

Resources and Support

Access the Toro TMC-212 PDF user guide online, explore support forums for community assistance, or directly contact Toro customer service for dedicated help․

Locating the User Guide (PDF)

Finding the official Toro TMC-212 User Guide in PDF format is straightforward, ensuring you have readily available documentation for your irrigation system․ As of today, February 17, 2026, a comprehensive 44-page guide is accessible online․ This document, often labeled as “Toro TMC-212 User Guide,” provides detailed instructions on installation, programming, troubleshooting, and maintenance․

Furthermore, resources like the Aqua Matic Owner Manual V2․05a (Jun06) can offer supplementary information related to the system’s core functionalities․ While some resources may be available in other languages, such as the “Programmateur-Serie-TMC-212-manuel-francais (Arrosage Auto),” the primary English PDF remains the most crucial document for North American users․ Always prioritize the official Toro documentation for accurate and reliable guidance․

Accessing Online Support Forums

Beyond the official Toro TMC-212 manual, a wealth of support exists within online forums and communities dedicated to irrigation systems and Toro products․ These platforms offer a collaborative environment where users can share experiences, troubleshoot issues, and exchange valuable tips․ While direct links aren’t provided in the current information, a general internet search for “Toro TMC-212 forum” or “Aqua Matic support” will yield relevant results․

These forums often contain discussions regarding common problems, programming intricacies, and even modifications to enhance system performance․ Remember to verify information shared by other users with the official Toro documentation to ensure accuracy and avoid potential damage to your system․ Engaging with these communities can significantly aid in resolving issues quickly and efficiently․

Contacting Toro Customer Service

For direct assistance with your Toro TMC-212, reaching out to Toro Customer Service is a reliable option․ While specific contact details aren’t explicitly provided in the available documentation, Toro generally offers support through phone, email, and potentially online chat․ Visiting the official Toro website is the best starting point to locate current contact information and support resources․

Be prepared to provide your TMC-212 model number and a detailed description of the issue you are experiencing․ Having the manual readily available during the call can also expedite the troubleshooting process․ Toro’s customer service representatives are equipped to address a wide range of concerns and provide expert guidance․


actionable insights with amazon quicksight pdf free download

Category : PDF

Amazon QuickSight PDF: Actionable Insights & Free Download Guide

Unlock data-driven decisions! Explore Amazon QuickSight’s PDF capabilities for sharing actionable insights, utilizing free download guides and tutorials for effective data visualization.

Amazon QuickSight emerges as a robust, cloud-native business intelligence (BI) service, empowering users to effortlessly analyze and visualize data at scale. It’s designed for everyone – from data analysts to business users – offering a fast, flexible, and affordable way to gain actionable insights. The platform seamlessly integrates with various data sources, including AWS services like S3, Redshift, and RDS, as well as on-premises databases.

QuickSight distinguishes itself through its SPICE (Super-fast, Parallel, In-memory Calculation Engine), a powerful in-memory engine that accelerates data processing and query performance. This allows for interactive dashboards and reports, even with large datasets. Furthermore, the service provides a wealth of visualization options, enabling users to create compelling charts, graphs, and dashboards. Numerous free download guides and tutorials, like those from Tech with Lucy, are available to help users quickly master the tool and unlock its full potential for data-driven decision-making.

What is Amazon QuickSight?

Amazon QuickSight is a fully-managed, serverless BI service that makes it remarkably easy to deliver actionable insights from data. It’s fundamentally a data visualization tool, built for the AWS cloud, allowing users to create and share interactive dashboards and reports. Unlike traditional BI solutions, QuickSight scales automatically, meaning you only pay for what you use.

The service leverages machine learning through QuickSight Q, enabling natural language querying – simply ask a question, and QuickSight will generate the corresponding visualization. Users can readily export these visualizations, including dashboards, as PDF documents for easy sharing and offline access. Numerous free resources, including tutorials and download guides, are available to help users navigate the platform and maximize its capabilities for data analysis and informed decision-making. The AWS SDK also provides programmatic access.

Key Features of Amazon QuickSight

Amazon QuickSight boasts several key features driving actionable insights. Its SPICE (Super-fast, Parallel, In-memory Calculation Engine) delivers incredibly fast query performance, even with large datasets. QuickSight Q, powered by machine learning, allows users to ask questions in natural language to generate visualizations.

The platform supports a wide array of data sources and offers robust data preparation capabilities. Users can create visually appealing and interactive dashboards with various chart types. Furthermore, QuickSight facilitates easy collaboration and sharing, including the ability to export dashboards as PDFs for convenient distribution. Many free tutorials and download guides are available, simplifying the learning curve and enabling users to quickly unlock the full potential of QuickSight for data-driven decision-making. The AWS SDK also provides extensive control.

Benefits of Using Amazon QuickSight

Amazon QuickSight delivers significant benefits, empowering users with actionable insights. Its pay-per-session pricing model offers cost-effectiveness, scaling to meet fluctuating demands. The speed of SPICE accelerates analysis, enabling quicker decision-making. QuickSight Q simplifies data exploration for all skill levels, removing the need for complex queries.

Sharing insights is streamlined through PDF exports and collaborative features. Accessing free download guides and tutorials accelerates user adoption and proficiency. Integration with other AWS services enhances data workflows. Ultimately, QuickSight transforms raw data into clear, concise visualizations, fostering a data-driven culture and improving business outcomes. The platform’s scalability and robust features make it ideal for organizations of all sizes seeking to unlock the power of their data.

Getting Started with QuickSight

Begin your journey! Create an AWS account, access the QuickSight console, and explore the interface to unlock actionable insights via PDF downloads.

Creating an Amazon Web Services (AWS) Account

Embarking on your QuickSight journey begins with an Amazon Web Services (AWS) account. This foundational step unlocks access to a powerful suite of cloud services, including QuickSight, enabling you to transform raw data into actionable insights. The process is straightforward: navigate to the AWS website and initiate the signup process. You’ll need to provide a valid email address and a secure password.

AWS requires a credit card for verification purposes, even if you intend to utilize the free tier. Carefully review the AWS Free Tier offerings to understand the services available at no cost. Once your account is created, ensure you complete the security verification steps. With a functioning AWS account, you’re primed to access QuickSight and begin exploring its capabilities, including exporting visualizations as PDFs for easy sharing and download. This initial setup is crucial for leveraging the full potential of QuickSight.

Accessing Amazon QuickSight Console

With your AWS account established, accessing the Amazon QuickSight console is the next crucial step. Navigate to the AWS Management Console and search for “QuickSight” in the services search bar. Select QuickSight to launch the service. You may be prompted to sign in again using your AWS credentials.

The QuickSight console is your central hub for all data visualization and analysis activities. From here, you can connect to various data sources, create datasets, design interactive dashboards, and generate reports. Remember, the goal is to transform data into actionable insights. Explore the console’s interface to familiarize yourself with its features, including options for exporting your visualizations as PDFs for convenient sharing and download. A well-understood console is key to unlocking QuickSight’s full potential.

Navigating the QuickSight Interface

The QuickSight interface is designed for intuitive data exploration. Upon logging in, you’ll find the homepage offering options to create analyses, datasets, and dashboards. The left navigation pane provides access to key areas like data sources, datasets, and recently accessed items.

Analyses are where you build visualizations, while dashboards combine multiple analyses for a comprehensive view. Understanding these core components is vital for deriving actionable insights. Look for the “Share” option to distribute your findings, and remember the ability to export as PDF for easy download and offline access. Familiarize yourself with the various chart types and customization options to effectively communicate your data stories. Mastering the interface unlocks QuickSight’s power for data-driven decision-making;

Data Sources & Preparation

Connect to diverse data sources, prepare data effectively, and import it into QuickSight to unlock actionable insights via PDF downloads and analysis.

Connecting to Data Sources

Amazon QuickSight excels at integrating with a vast array of data sources, empowering users to derive actionable insights. Seamlessly connect to popular databases like Amazon Redshift, Amazon Athena, and Snowflake, alongside widely used services such as Amazon S3, and various on-premise data warehouses.

This connectivity is crucial for building comprehensive dashboards and reports, ultimately facilitating informed decision-making. The ability to access data from multiple sources within a single QuickSight environment streamlines the analytical process. Furthermore, QuickSight supports direct connections and data import methods, offering flexibility based on your specific needs.

Once connected, data can be prepared and transformed within QuickSight, ensuring it’s optimized for visualization and PDF export, enabling easy sharing of actionable insights. Explore free download guides to master these connections!

Supported Data Source Types

Amazon QuickSight boasts impressive compatibility, supporting numerous data source types for comprehensive actionable insights. Key connections include relational databases like MySQL, PostgreSQL, and SQL Server, alongside cloud data warehouses such as Amazon Redshift and Snowflake. Direct integration with Amazon S3, Athena, and other AWS services is also readily available.

Beyond databases, QuickSight connects to flat files (CSV, TSV), popular SaaS applications, and even utilizes APIs for custom data integration. This broad support ensures you can leverage existing data infrastructure. Utilizing these connections allows for the creation of impactful dashboards and reports, ready for PDF export.

Accessing free download guides will help you navigate the specifics of each data source, maximizing your ability to unlock valuable actionable insights.

Data Preparation with QuickSight

QuickSight empowers users to refine raw data into actionable insights through robust preparation tools. This includes data cleansing, transformation, and enrichment directly within the platform, minimizing the need for external ETL processes. You can easily filter, sort, and aggregate data, creating calculated fields to derive new metrics.

QuickSight’s SPICE (Super-fast, Parallel, In-memory Calculation Engine) accelerates data processing, enabling rapid exploration and visualization. Data preparation is crucial for accurate PDF reports. Free download guides demonstrate how to effectively utilize these features.

Mastering these techniques unlocks the full potential of your data, ensuring your dashboards deliver clear, concise, and actionable insights, ready for distribution as professional PDF documents.

Importing Data into QuickSight

QuickSight simplifies data ingestion from diverse sources, crucial for generating actionable insights. Connect directly to AWS services like S3, Redshift, and Athena, or utilize connectors for popular databases and file formats. Seamless data import fuels effective PDF report creation.

The process involves selecting your data source, configuring connection details, and choosing the specific datasets to import. QuickSight supports both direct query and import modes, allowing you to balance real-time access with performance optimization. Numerous free download guides detail these steps.

Successful data import is the foundation for impactful visualizations and actionable insights, ultimately enhancing the value of your PDF deliverables.

Visualizing Data with QuickSight

Transform data into compelling visuals! QuickSight’s charts and graphs unlock actionable insights, perfect for PDF reports, with free download guides available now.

Choosing the Right Visualization

Selecting the optimal visualization within Amazon QuickSight is crucial for conveying actionable insights effectively, especially when preparing data for PDF export. Consider your data’s nature and the story you aim to tell. Bar charts excel at comparing discrete categories, while line charts demonstrate trends over time.

Pie charts are useful for showing proportions, but avoid overusing them with numerous slices. Scatter plots reveal relationships between variables. QuickSight offers diverse options, including heatmaps and geospatial visualizations. Prioritize clarity and simplicity; a well-chosen chart quickly communicates key findings.

Remember that the goal is to transform raw data into understandable information, enhancing the impact of your PDF reports and facilitating data-driven decision-making. Explore QuickSight’s free download guides for detailed examples and best practices.

Creating Charts and Graphs

Amazon QuickSight simplifies chart and graph creation, empowering you to visualize actionable insights for impactful PDF reports. Begin by selecting your desired visualization type – bar, line, pie, or scatter plot – based on your data and analytical goals. Drag and drop fields from your dataset onto the appropriate axes or sections within QuickSight’s intuitive interface.

Customize colors, labels, and titles to enhance clarity and readability. Utilize QuickSight’s built-in formatting options to align visuals with your branding. Experiment with different chart configurations to uncover hidden patterns and trends. Remember to focus on presenting data in a concise and easily digestible manner, maximizing the value of your exported PDFs.

Leverage free download guides to master advanced charting techniques and unlock QuickSight’s full potential.

Customizing Visualizations

Amazon QuickSight offers extensive customization options to refine your visualizations and deliver truly actionable insights within PDF reports. Tailor colors, fonts, and labels to match your brand identity and enhance clarity. Adjust axis scales and add trendlines to highlight key patterns in your data. Explore conditional formatting to emphasize critical values and draw attention to outliers.

Utilize QuickSight’s interactive features, such as tooltips and drill-downs, to provide users with deeper context. Experiment with different chart types and layouts to optimize data presentation. Remember that effective customization transforms raw data into compelling narratives, maximizing the impact of your PDF exports.

Access free download guides for detailed instructions on mastering QuickSight’s customization capabilities.

Using Filters and Parameters

Amazon QuickSight empowers users to refine data exploration with powerful filters and parameters, crucial for generating actionable insights within PDF reports. Filters allow you to focus on specific subsets of your data, enabling targeted analysis and clearer visualizations. Parameters introduce dynamic control, letting viewers interact with the data and explore different scenarios.

Implement filters based on date ranges, categories, or numerical values to isolate relevant information. Utilize parameters to enable users to adjust key metrics and observe the resulting changes in visualizations. These interactive elements transform static PDFs into dynamic tools for data discovery.

Leverage free download guides to learn advanced filtering and parameter techniques for impactful PDF reporting.

Advanced QuickSight Features

Discover QuickSight Q’s natural language querying and ML Insights! Unlock deeper actionable insights, enhance PDF reports, and explore free download resources today.

Amazon QuickSight Q: Natural Language Querying

Amazon QuickSight Q revolutionizes data exploration, enabling users to ask questions in plain English and receive instant, actionable insights. This feature eliminates the need for complex SQL queries or intricate dashboard navigation, democratizing data access across organizations. Users can simply type a question – for example, “What were sales last quarter?” – and QuickSight Q intelligently interprets the request and delivers a relevant visualization or answer.

This natural language interface significantly accelerates the analytical process, allowing for faster identification of trends and patterns. Combined with the ability to export dashboards to PDF, QuickSight Q empowers users to easily share these insights with stakeholders. Furthermore, the upcoming ability to customize the Q search bar’s look and feel will enhance user experience. Numerous free download guides and tutorials are available to help users master QuickSight Q and unlock its full potential for data-driven decision-making.

QuickSight ML Insights

QuickSight’s ML Insights leverage machine learning to automatically uncover hidden patterns and anomalies within your data, delivering truly actionable insights. These insights go beyond traditional reporting, proactively identifying key drivers of performance and forecasting future trends. Features include anomaly detection, forecasting, and key driver analysis, all accessible through an intuitive interface.

By automating the discovery process, ML Insights empower users to make data-driven decisions with greater confidence and speed. The ability to export these ML-powered dashboards to PDF facilitates easy sharing and collaboration. Numerous free resources, including download guides and tutorials, are available to help users effectively utilize QuickSight’s ML capabilities. These resources demonstrate how to integrate ML Insights into your workflows and unlock deeper understanding from your data, ultimately leading to improved business outcomes.

Embedding QuickSight Dashboards

Embedding QuickSight dashboards directly into your applications and websites allows you to seamlessly integrate actionable insights into the user experience. This eliminates the need for users to navigate to a separate QuickSight console, fostering greater engagement and data-driven decision-making within existing workflows. Amazon provides robust APIs and documentation to simplify the embedding process.

Embedded dashboards can be customized to match your brand’s look and feel, ensuring a consistent user experience. Furthermore, exporting these embedded visualizations to PDF offers a convenient way to share static reports and insights offline. Numerous free download guides and tutorials are available, detailing the embedding process and best practices. These resources demonstrate how to securely embed dashboards and control access, maximizing the value of your data and enhancing user productivity.

Collaboration and Sharing

Amazon QuickSight facilitates seamless collaboration and sharing of actionable insights across your organization. Dashboards can be easily shared with colleagues, enabling teams to work together on data analysis and decision-making. Permissions can be granularly controlled, ensuring data security and compliance. Sharing options include direct access to dashboards, or exporting them as PDF reports for wider distribution.

Leveraging QuickSight’s sharing features, coupled with readily available free download guides, empowers users to disseminate key findings effectively. These guides often detail best practices for collaborative analysis and report distribution. Exporting to PDF allows for offline access and easy integration into presentations or reports. This collaborative environment fosters a data-driven culture, maximizing the impact of your insights and driving better business outcomes.

Downloading QuickSight Visualizations as PDF

Easily export QuickSight dashboards to PDF, sharing actionable insights widely! Utilize free download guides for customization and troubleshooting during the export process.

Exporting Dashboards to PDF

QuickSight simplifies sharing actionable insights by allowing seamless dashboard exports to PDF format. This feature is crucial for distributing reports to stakeholders who may not have direct access to the QuickSight console. The process involves selecting the desired dashboard and choosing the “Export to PDF” option.

Before exporting, consider the layout and content to ensure clarity and impact. PDF exports preserve the visual fidelity of your charts and graphs, maintaining the integrity of your data storytelling. Leverage free download guides and tutorials to master the export settings, optimizing for readability and file size.

QuickSight’s PDF export functionality is a powerful tool for democratizing data access and fostering informed decision-making across your organization. It’s a key component in delivering value from your data investments, ensuring that actionable insights reach the right people, at the right time.

PDF Customization Options

Amazon QuickSight offers several PDF customization options to enhance the presentation of your actionable insights. While options are evolving, you can typically control page size, orientation (portrait or landscape), and margins during the export process; These settings ensure your dashboards fit neatly within the PDF document, optimizing readability for recipients.

Currently, theming options for the QuickSight Q search bars are “coming soon,” indicating future enhancements to visual control. Explore free download guides to discover the latest available customization features.

Effective PDF customization transforms data reports into professional, polished documents. By tailoring the layout and appearance, you reinforce your brand identity and improve the overall impact of your actionable insights, making them more engaging and easier to understand.

Troubleshooting PDF Export Issues

PDF export failures in Amazon QuickSight can stem from various causes. Large datasets or complex visualizations may exceed export limits, resulting in errors. Ensure your dashboards are optimized for performance and consider simplifying complex charts. Check data source connectivity; intermittent issues can disrupt the export process.

If encountering problems, consult the official Amazon QuickSight documentation and free download guides for specific error codes and solutions. Utilize the QuickSight SDK help via the command aws quicksight help for detailed API instructions.

Remember to verify browser compatibility and clear cache/cookies. Addressing these common issues will help you reliably generate PDFs containing your valuable actionable insights, ensuring seamless sharing and analysis.

Resources & Further Learning

Explore official Amazon QuickSight documentation, tutorials, and free PDF download resources to master data visualization and unlock actionable insights!

Official Amazon QuickSight Documentation

Dive deep into Amazon QuickSight’s comprehensive official documentation – your primary resource for mastering this powerful Business Intelligence service. This documentation provides detailed explanations of every feature, from connecting to various data sources and preparing data, to building stunning visualizations and sharing actionable insights.

You’ll find extensive guides on exporting dashboards to PDF format, including customization options and troubleshooting steps for common issues. The documentation also covers advanced features like QuickSight Q (natural language querying) and ML Insights, empowering you to derive even more value from your data.

Access API references and SDK help to integrate QuickSight into your existing workflows. Learn about security best practices and governance features to ensure data privacy and compliance. Regularly updated, the official documentation is essential for staying current with QuickSight’s evolving capabilities and maximizing your return on investment. Find a wealth of free resources to enhance your understanding.

QuickSight Tutorials and Guides

Enhance your Amazon QuickSight proficiency with a wealth of readily available tutorials and guides. These resources, often created by the community and AWS experts, offer practical, step-by-step instructions for building impactful dashboards and extracting actionable insights. Many tutorials focus on specific use cases, demonstrating how to visualize data effectively for different industries and business functions.

Explore guides covering data preparation techniques, advanced charting options, and the integration of QuickSight with other AWS services. Several resources demonstrate how to export dashboards to PDF, tailoring the output for presentations and reports. Look for tutorials created as part of programs like Tech with Lucy, providing structured learning paths.

Discover free resources that simplify complex concepts, accelerating your learning curve and enabling you to unlock the full potential of QuickSight for data-driven decision-making. These guides are invaluable for both beginners and experienced users.

Free QuickSight PDF Resources

Access a diverse collection of free PDF resources designed to empower your Amazon QuickSight journey. These downloadable materials often include comprehensive guides detailing the process of exporting dashboards to PDF format, ensuring your actionable insights are easily shareable and presentable. Many resources focus on customization options, allowing you to tailor PDF outputs to specific branding requirements.

Find tutorials demonstrating how to troubleshoot common PDF export issues, maximizing efficiency and minimizing disruptions. Explore resources that showcase best practices for data visualization within QuickSight, leading to clearer and more impactful reports.

Utilize these free materials to deepen your understanding of QuickSight’s capabilities and unlock the full potential of data-driven decision-making. These resources are invaluable for users seeking to enhance their analytical skills.


new york state pattern jury instructions

Category : Instructions

New York State Pattern Jury Instructions: A Comprehensive Overview

New York’s pattern jury instructions, encompassing both Criminal Jury Instructions (CJI2d) and New York Pattern Jury Instructions – Civil (PJI), are vital for fair trials.

New York jury instructions serve as the legal roadmap for jurors, guiding their deliberations and ensuring consistent application of the law. These instructions, meticulously crafted by the New York State Unified Court System’s committees, translate complex legal principles into understandable terms. They are foundational to the judicial process, promoting fairness and accuracy in verdicts.

The system utilizes two primary sets: the Criminal Jury Instructions (CJI2d) for criminal cases and the New York Pattern Jury Instructions – Civil (PJI) for civil disputes. These patterns aren’t mandatory, but strongly encouraged, offering a standardized approach to instruction delivery, ultimately safeguarding due process.

II. Historical Development of Pattern Jury Instructions in New York

The evolution of New York’s pattern jury instructions reflects a commitment to clarity and consistency in legal proceedings. Initially, instructions were largely ad hoc, varying significantly between judges and potentially introducing bias. Recognizing this, efforts began to standardize instructions, culminating in the first formal pattern instructions in the mid-20th century.

Subsequent revisions, notably the development of CJI2d and PJI, aimed to incorporate evolving case law and refine legal language. These ongoing updates, driven by the Committee on Criminal Jury Instructions and similar bodies, demonstrate a continuous pursuit of improved jury guidance and equitable outcomes.

III. The Role of the Committee on Criminal Jury Instructions

The New York State Unified Court System’s Committee on Criminal Jury Instructions plays a pivotal role in maintaining and updating CJI2d, the state’s primary resource for criminal jury charges. Composed of experienced judges and practitioners, the Committee meticulously reviews proposed instructions, ensuring alignment with current statutory law and case precedents.

Their work extends to crafting Model Colloquies, providing standardized guidance for judges during jury interactions. This dedication to precision and clarity aims to minimize legal errors and promote fair trials throughout New York’s court system, bolstering public trust in judicial proceedings.

IV. Understanding CJI2d (Criminal Jury Instructions for the Second Circuit)

CJI2d, or Criminal Jury Instructions for the Second Circuit, serves as the cornerstone for criminal trials in New York. It provides judges with standardized, legally vetted instructions on various elements of crimes, defenses, and procedural matters. Utilizing CJI2d promotes consistency and reduces the risk of erroneous jury decisions.

The instructions are regularly updated by the Committee on Criminal Jury Instructions to reflect evolving case law. Judges may modify instructions, but must adhere to legal considerations, ensuring they accurately convey the law to the jury.

A. Structure and Organization of CJI2d

CJI2d is meticulously structured for ease of use by legal professionals. Instructions are organized by subject matter, aligning with New York Penal Law and relevant case decisions. An alphabetical list facilitates quick location of specific instructions. Each instruction includes a statement of the legal principle, a charge outlining the wording for the jury, and notes providing context and potential issues.

This systematic approach ensures judges can efficiently locate and adapt instructions to fit the unique facts of each case, promoting clarity and accuracy in jury deliberations.

B. Updates and Amendments to CJI2d

The Committee on Criminal Jury Instructions diligently maintains CJI2d, responding to changes in New York law and judicial interpretations. Updates and amendments reflect significant case law developments, ensuring instructions remain current and legally sound. These revisions are published periodically, with the Committee carefully considering public comments and feedback from practitioners.

Staying abreast of these changes is crucial for attorneys and judges. Accessing the latest version via New York Courts’ website guarantees the use of accurate and approved jury instructions, vital for fair trial outcomes.

V. New York Pattern Jury Instructions – Civil (PJI)

New York Pattern Jury Instructions – Civil (PJI) provide standardized guidance for civil trials within the state. These instructions cover a broad spectrum of civil litigation areas, including negligence, breach of contract, and various tort claims. PJI aims to promote consistency and clarity in jury deliberations, ensuring a fair and understandable presentation of legal principles.

Law libraries maintain physical copies of PJI, while digital access is available through legal research databases. Utilizing PJI is essential for civil practitioners in New York.

A. Scope and Application of PJI

The New York Pattern Jury Instructions – Civil (PJI) encompass a wide range of civil actions heard in New York State courts. These instructions are applicable in cases involving negligence, property damage, contract disputes, and various other civil claims. PJI provides standardized language for communicating legal principles to juries, aiming for uniformity across different courtrooms.

PJI’s application isn’t mandatory, but courts strongly encourage their use to ensure clarity and reduce the risk of reversible error. Attorneys often modify PJI to fit specific case facts.

B. Key Differences Between CJI2d and PJI

CJI2d (Criminal Jury Instructions for the Second Circuit) focuses exclusively on criminal law, covering elements of offenses, defenses, and evidentiary matters within federal criminal trials in New York. Conversely, PJI (New York Pattern Jury Instructions – Civil) addresses civil litigation, encompassing areas like negligence, contracts, and torts.

The structure also differs; CJI2d aligns with federal legal standards, while PJI reflects New York State’s civil practice. PJI instructions are generally more detailed regarding damages, a key component of civil cases, unlike CJI2d.

VI. Accessing New York Jury Instructions

New York State provides convenient access to its pattern jury instructions. The official New York Courts website (NYCourts.gov) hosts both Criminal Jury Instructions (CJI2d) and New York Pattern Jury Instructions – Civil (PJI) in digital formats, facilitating easy searching and downloading.

Additionally, comprehensive collections are available in New York law libraries, offering print editions for offline use. These libraries, often found within courthouses and law schools, provide a reliable resource for legal professionals and researchers seeking these crucial documents.

A. Online Resources: NYCourts.gov

NYCourts.gov serves as the primary online repository for New York’s pattern jury instructions. Users can readily access both Criminal Jury Instructions (CJI2d) and New York Pattern Jury Instructions – Civil (PJI) through a user-friendly interface. The website allows for efficient searching by keyword, topic, or instruction number, streamlining the research process.

Regular updates and amendments to the instructions are promptly reflected on NYCourts.gov, ensuring legal professionals have access to the most current versions. This digital accessibility promotes consistency and accuracy in jury instruction practices statewide.

B. Law Library Resources and Print Editions

Despite the increasing prevalence of online resources, traditional law libraries remain crucial for accessing New York pattern jury instructions. Print editions of both Criminal Jury Instructions (CJI2d) and New York Pattern Jury Instructions – Civil (PJI) are typically available in law library collections, offering a reliable alternative to digital access.

These print editions often include supplementary materials, such as annotations and commentary, providing deeper insights into the instructions’ application. Law librarians can assist in locating specific instructions and navigating the complexities of jury instruction law.

VII. Core Components of a Typical Jury Instruction

A standard New York jury instruction generally comprises several key elements. These include a statement of the relevant legal principle, outlining the law applicable to the case. Following this is a clear articulation of the elements that the prosecution or plaintiff must prove to establish their claim.

Crucially, instructions also define specific legal terms, ensuring jurors understand the terminology used. Often, cautionary instructions are included, guiding jurors on how to weigh evidence and avoid common pitfalls in deliberation.

VIII. Common Types of Criminal Jury Instructions

New York’s CJI2d provides instructions covering a wide spectrum of criminal offenses. Instructions on elements of crimes meticulously detail each component the prosecution must prove beyond a reasonable doubt for conviction. These range from defining actus reus and mens rea to specific intent requirements.

Furthermore, instructions address various defenses, such as self-defense, insanity, or alibi, outlining the legal standards for their successful assertion. Instructions regarding accomplice liability and lesser included offenses are also frequently utilized, ensuring comprehensive guidance for jurors.

A. Instructions on Elements of Crimes

New York’s CJI2d meticulously outlines instructions detailing the essential elements of each crime. These instructions guide jurors in understanding precisely what the prosecution must demonstrate beyond a reasonable doubt to secure a conviction. They define both the actus reus – the guilty act – and the mens rea – the guilty mind, specifying the required intent.

Instructions cover specific intent crimes, general intent crimes, and strict liability offenses, ensuring clarity. They also address the burden of proof, emphasizing the presumption of innocence and the prosecution’s duty to prove each element.

B. Instructions on Defenses

CJI2d provides comprehensive instructions regarding various criminal defenses available in New York law. These include justifications like self-defense, defense of others, and necessity, clearly outlining the legal requirements for each. Instructions also cover excuses, such as duress, insanity, and intoxication, explaining how these defenses, if proven, may negate criminal liability.

The instructions meticulously detail the burden of proof regarding affirmative defenses, typically resting with the defendant. They ensure jurors understand how to evaluate evidence presented in support of a defense and its impact on the prosecution’s case.

IX. Common Types of Civil Jury Instructions

New York Pattern Jury Instructions – Civil (PJI) offers standardized guidance for frequently litigated civil matters. Instructions on negligence are central, detailing duty of care, breach, causation, and damages, crucial elements for plaintiffs to establish liability. PJI also provides detailed instructions for breach of contract claims, covering contract formation, performance, breach, and available remedies.

Further instructions address areas like premises liability, intentional torts, and various statutory claims, ensuring consistent application of legal principles. These instructions aim to clearly articulate the legal standards for jurors to apply to the presented facts.

A. Instructions on Negligence

New York’s PJI provides comprehensive instructions on negligence, a cornerstone of many civil cases. Jurors are guided through the four essential elements: duty, breach, causation (both cause-in-fact and proximate cause), and damages. Instructions meticulously define the standard of care owed by the defendant, emphasizing reasonableness under the circumstances.

PJI also addresses comparative negligence, allowing jurors to apportion fault between parties. Detailed guidance is given on assessing damages, including economic and non-economic losses. These instructions aim to ensure a clear understanding of negligence principles for a just verdict.

B. Instructions on Breach of Contract

New York PJI offers detailed instructions for breach of contract cases, guiding jurors through essential elements. These include a valid contract’s existence, performance by the plaintiff, the defendant’s breach, and resulting damages. Instructions clarify contract formation requirements, including offer, acceptance, and consideration.

PJI also addresses contract interpretation, emphasizing the plain meaning of the agreement’s language. Jurors receive guidance on assessing damages, encompassing both direct and consequential losses. These instructions aim to ensure a fair and accurate determination of contractual rights and obligations, leading to a just outcome.

X. Modifying Pattern Jury Instructions

While New York pattern jury instructions provide a solid foundation, modification is sometimes necessary to fit specific case facts. Adjustments are appropriate when the standard instructions don’t adequately address unique issues or legal arguments presented during trial. However, any alterations must remain grounded in established legal principles and statutory authority.

Legal considerations demand that modifications accurately reflect the law and avoid misleading the jury. Attorneys must propose changes with precision, ensuring clarity and avoiding prejudice. Courts carefully review proposed modifications to uphold fairness and prevent erroneous jury decisions.

A. When Modification is Appropriate

Modifying New York’s pattern jury instructions is appropriate when the standard language doesn’t fully capture the nuances of a specific case. This often arises with novel legal issues, complex factual scenarios, or when a particular defense requires tailored instruction. If the facts diverge significantly from those contemplated by the pattern instructions, modification becomes crucial.

Furthermore, if case law dictates a specific phrasing or clarifies an element of a claim or defense, the instructions must reflect those developments. Attorneys should seek modification when the existing instructions could mislead the jury or fail to adequately present a party’s legal theory.

B. Legal Considerations for Tailoring Instructions

When tailoring New York jury instructions, attorneys must adhere to several legal considerations. Modifications should accurately reflect the applicable law, avoiding any language that misstates legal principles or creates new ones. Proposed changes must be supported by evidence presented at trial and relevant case law.

Crucially, altered instructions must not be misleading or prejudicial. Attorneys should anticipate potential jury confusion and ensure clarity. Any modification requires careful review by the court to guarantee it aligns with established legal standards and doesn’t improperly influence the jury’s deliberation.

XI. Challenges in Using Pattern Jury Instructions

Despite their benefits, utilizing New York’s pattern jury instructions presents challenges. Attorneys may encounter situations where existing instructions don’t perfectly fit the unique facts of a case, necessitating careful tailoring. Determining the appropriate level of modification can be complex, balancing accuracy with adherence to the pattern format.

Furthermore, keeping abreast of frequent updates to CJI2d and PJI requires diligence. Ensuring instructions accurately reflect current case law and statutory changes is crucial, demanding ongoing legal research and analysis to avoid potential errors.

XII. The Impact of Case Law on Jury Instructions

New York case law profoundly impacts jury instructions, constantly shaping their interpretation and application. Appellate court decisions frequently clarify ambiguities within pattern instructions or mandate revisions based on evolving legal principles. Attorneys must meticulously research relevant case law to ensure instructions align with current judicial precedent.

Failure to do so can lead to reversible error, potentially jeopardizing a conviction or judgment. The Committee on Criminal Jury Instructions regularly updates CJI2d to reflect significant case law developments, highlighting the dynamic relationship between judicial rulings and instructional guidance.

XIII. Recent Developments in New York Jury Instruction Law (as of 02/06/2026)

As of February 6, 2026, New York courts continue refining jury instructions, particularly concerning evidentiary rulings and complex legal standards. Recent cases emphasize the need for clarity in instructions regarding accomplice liability and the definition of “reasonable doubt.” Updates to the Criminal Jury Instructions (CJI2d) reflect these changes.

Furthermore, ongoing discussions address instructions related to expert testimony and the admissibility of scientific evidence. Attorneys should consult the New York Courts website (NYCourts.gov) for the latest revisions and guidance on proper instruction formulation.

XIV. Model Colloquies and Their Purpose

Model Colloquies, accompanying New York’s pattern jury instructions (CJI2d and PJI), serve as standardized scripts for judges during trial. These colloquies ensure consistent communication with the jury, particularly during voir dire, preliminary instructions, and final charge delivery. They address common procedural matters and potential juror questions.

Utilizing Model Colloquies promotes judicial efficiency and reduces the risk of reversible error stemming from improper communication. The Committee on Criminal Jury Instructions regularly updates these colloquies to reflect evolving case law and best practices, available on NYCourts.gov.

XV. Resources for Continuing Legal Education on Jury Instructions

Attorneys in New York benefit from numerous continuing legal education (CLE) programs focused on jury instructions. The New York State Bar Association (NYSBA) frequently offers courses covering CJI2d and PJI updates, modification strategies, and effective instruction delivery techniques. Several private CLE providers also specialize in trial advocacy, including instruction-specific workshops.

These programs help lawyers navigate complex instruction sets, understand recent case law impacting jury charges, and avoid common pitfalls. Staying current through CLE is crucial for ensuring fair trials and preserving appellate review.

XVI. The Importance of Clear and Concise Jury Instructions

Clear and concise jury instructions are paramount to ensuring a fair trial in New York. Ambiguous or overly complex language can confuse jurors, leading to incorrect decisions. Pattern instructions, like CJI2d and PJI, aim for clarity, but modification requires careful attention to readability.

Instructions must accurately reflect the law and the specific facts of the case, presented in a manner easily understood by laypersons. Avoiding legal jargon and using plain language are essential for effective communication and upholding the integrity of the judicial process.

XVII. Future Trends in New York Jury Instruction Practice

Future trends in New York jury instruction practice likely involve increased digitization and accessibility of CJI2d and PJI. Expect enhanced online resources via New York Courts.gov, potentially including interactive tools for tailoring instructions.

Further refinement of pattern instructions based on evolving case law is anticipated, alongside continued efforts to simplify language. The integration of technology in courtrooms may necessitate adjustments to instruction delivery methods, ensuring jurors remain engaged and comprehend the legal principles at hand.

XVIII. Conclusion: Ensuring Fair and Accurate Jury Deliberations

New York’s commitment to pattern jury instructions – CJI2d and PJI – is paramount to upholding fair and accurate jury deliberations. These instructions, continually updated by the Committee on Criminal Jury Instructions, provide a crucial framework for jurors.

Accessibility through resources like New York Courts.gov and law libraries reinforces their importance. Ongoing refinement, reflecting current case law, ensures instructions remain relevant and understandable, ultimately safeguarding the integrity of the judicial process and promoting just outcomes in New York courts.