ambient technologies remote control manual
Category : Manuals
Ambient Technologies Remote Control Manual⁚ A Comprehensive Guide
Welcome! This guide provides comprehensive information about your Ambient Technologies remote control. It covers everything from initial setup and operation to troubleshooting common issues. Learn about advanced features‚ safety precautions‚ and warranty details for your device.
Ambient Technologies offers a diverse selection of remote controls designed to enhance the comfort and convenience of your gas fireplace. These remotes provide wireless control‚ allowing you to adjust the temperature and flame height without leaving your seat. They are compatible with various gas fireplace brands‚ stoves‚ and log sets‚ ensuring seamless integration into your existing setup.
Ambient Technologies remote controls are engineered with user-friendliness in mind‚ featuring ergonomic designs and intuitive interfaces. Many models include thermostatic control‚ enabling precise temperature management for optimal comfort. The remotes also prioritize safety with features such as childproof protection and thermal-safety shutdown‚ providing peace of mind for you and your family.

Beyond basic on/off functionality‚ some Ambient Technologies remotes offer advanced features like flame height adjustment and blower control. These features let you customize your fireplace experience to match your preferences. Ambient Technologies is committed to providing superior customer service and technical support‚ ensuring you have the resources you need to maximize the benefits of your remote control.
Understanding Remote Control Functionality
Ambient Technologies remote controls operate by sending radio frequency (RF) signals to a receiver connected to your gas fireplace. This wireless communication allows you to control your fireplace from a distance‚ typically up to 20 feet. The remote control transmits commands to turn the fireplace on or off‚ adjust the flame height‚ and set the desired room temperature.
Many Ambient Technologies remotes feature a thermostat function. This feature allows you to set a target temperature‚ and the remote will automatically regulate the fireplace to maintain that temperature. Some models also include a manual mode‚ which allows you to directly control the flame height and blower speed. The remote’s display provides feedback on the current settings and temperature‚ ensuring you are always aware of your fireplace’s status.
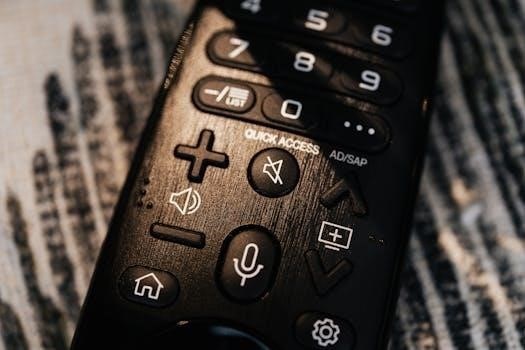
Understanding the different buttons and functions on your remote is crucial for optimal use. Familiarize yourself with the power button‚ temperature adjustment buttons‚ and any specialized features your remote may offer. This knowledge will empower you to take full advantage of your Ambient Technologies remote control and enjoy the warmth and ambiance of your gas fireplace with ease.
Identifying Your Remote Control Model
Identifying your Ambient Technologies remote control model is crucial for accessing the correct documentation‚ troubleshooting tips‚ and replacement parts. The model number is typically located on the back of the remote control‚ often printed on a sticker or molded into the plastic casing. Look for a combination of letters and numbers‚ such as RCST‚ RCB‚ or RCSITEA. This identifier is unique to your specific remote control.
If you cannot locate the model number on the remote itself‚ check the original packaging or any accompanying documentation‚ such as the installation manual or warranty card. The model number should be clearly indicated on these materials. Once you have identified the model number‚ you can easily find the corresponding user manual on the Ambient Technologies website or through a general internet search.

Having the correct model number ensures you are using the appropriate instructions and settings for your remote. This prevents potential errors during setup‚ operation‚ or troubleshooting. It also allows you to quickly find compatible accessories and replacement parts‚ such as batteries or replacement remotes‚ if needed. Accurate identification is the first step towards a smooth and hassle-free experience with your Ambient Technologies remote control.
Safety Precautions and Warnings
Prior to operating your Ambient Technologies remote control‚ it is essential to understand and adhere to all safety precautions and warnings. These guidelines are in place to prevent personal injury‚ property damage‚ and ensure the longevity of your device. Always consult the appliance owner’s manual for additional safety information and warnings related to accessory installation.
Never expose the remote control to excessive heat‚ moisture‚ or direct sunlight‚ as this can damage the internal components and reduce its lifespan. Ensure the battery compartment is securely closed to prevent battery leakage‚ which can cause corrosion and malfunction. When replacing batteries‚ use the correct type and voltage as specified in the manual. Incorrect batteries may damage the remote.
Keep the remote control out of reach of children and pets to prevent accidental ingestion of small parts‚ such as batteries. Do not attempt to disassemble or modify the remote control‚ as this can void the warranty and create a safety hazard. If the remote control is not functioning properly‚ contact Ambient Technologies support for assistance. Avoid using the remote near flammable materials or in explosive environments. Always prioritize safety when operating any electronic device.
Installation Guide
This section provides a step-by-step guide to installing your Ambient Technologies remote control system‚ ensuring proper setup and functionality. Before you begin‚ carefully unpack all components and verify that you have everything listed in the parts list. Contact the dealer or Ambient Technologies support if any parts are missing or damaged.
First‚ locate the receiver box and determine the best mounting location. The receiver should be within the specified range of the transmitter (typically 20 feet) and away from sources of interference. Some receivers come with an optional wall plate for in-wall mounting. Securely mount the receiver using the provided screws and hardware. Next‚ connect the wiring from the receiver to your gas fireplace or appliance‚ following the wiring diagram in the manual. Ensure all connections are tight and secure.
Install the batteries into the transmitter remote‚ paying attention to the correct polarity. Once the wiring is connected and the batteries are installed‚ test the remote control to ensure it is communicating with the receiver. Refer to the troubleshooting section if you encounter any issues during installation.
Initial Setup and Pairing
This section details the initial setup and pairing process for your Ambient Technologies remote control. Before operating your fireplace‚ it’s crucial to properly sync the transmitter and receiver for seamless communication. Begin by ensuring that fresh batteries are installed correctly in both the transmitter and receiver units.
Next‚ locate the pairing or “learn” button on the receiver box. The location may vary depending on the specific model. Press and hold the pairing button until the indicator light begins to blink. Immediately after‚ press the “on” button on the transmitter remote. This sends a signal to the receiver‚ initiating the pairing sequence. Observe the indicator light on the receiver; it should become solid‚ indicating a successful connection.
If the pairing fails‚ repeat the process. Ensure that the transmitter is within close proximity to the receiver during pairing. Some models might require entering a security code. Consult the manual for specific instructions. After successful pairing‚ test the remote’s functionality by turning the fireplace on and off; If problems persist‚ consult the troubleshooting section.
Operating Instructions
Operating Instructions
This section outlines the operational procedures for your Ambient Technologies remote control. Once the initial setup is complete‚ you can begin using the remote to control your gas fireplace. The basic functions typically include turning the fireplace on and off. Simply press the “on” button to ignite the flames and the “off” button to extinguish them.
Many Ambient Technologies remotes also feature thermostatic control. This allows you to set a desired room temperature‚ and the fireplace will automatically adjust its flame height to maintain that temperature. Use the up and down arrow buttons to adjust the setpoint. Some models also include a manual mode‚ allowing you to directly control the flame height using dedicated buttons.
Timer functions may also be available‚ enabling you to program the fireplace to turn on or off at specific times. Refer to your specific remote model’s documentation for detailed instructions on using the timer function. Always ensure that the fireplace is operating safely and according to the manufacturer’s guidelines.
Troubleshooting Common Issues
Troubleshooting Common Issues
This section addresses common issues encountered while using your Ambient Technologies remote control. If your fireplace fails to ignite or respond to the remote‚ first check the batteries in both the remote and the receiver. Ensure they are properly installed and have sufficient charge. A low battery is a frequent cause of malfunction.
Next‚ verify that the remote and receiver are properly paired. Refer to the “Initial Setup and Pairing” section for instructions on how to synchronize the devices. If pairing is unsuccessful‚ try resetting both the remote and the receiver by removing the batteries for a few minutes and then reinserting them.
Another potential problem is interference from other electronic devices. Try moving the receiver away from other appliances or sources of radio frequency interference. If the issue persists‚ consult the Ambient Technologies support website or contact their customer service for further assistance. Make sure the remote is within the specified range.
Battery Replacement and Maintenance
Battery Replacement and Maintenance
Proper battery maintenance ensures optimal performance and longevity of your Ambient Technologies remote control. When the remote’s display indicates low battery or the fireplace responds erratically‚ replace the batteries immediately. Refer to the “Identifying Your Remote Control Model” section to determine the correct battery type for your specific remote.
To replace the batteries‚ locate the battery compartment‚ usually on the back or bottom of the remote. Open the compartment and remove the old batteries‚ noting the correct polarity (+ and -). Insert new batteries of the specified type‚ ensuring they are aligned correctly. Close the battery compartment securely.
For extended periods of non-use‚ remove the batteries to prevent corrosion and potential damage to the remote. Clean the battery contacts periodically with a dry cloth to remove any residue. Avoid using excessive force when opening or closing the battery compartment to prevent damage. Store the remote in a cool‚ dry place away from direct sunlight and extreme temperatures.
Advanced Features and Settings
Advanced Features and Settings
Ambient Technologies remotes often come equipped with advanced features and customizable settings to enhance your fireplace experience. These features may vary depending on your specific remote model‚ so consult your remote’s display or the “Identifying Your Remote Control Model” section to understand the capabilities of your remote.
Many remotes offer thermostatic control‚ allowing you to set a desired room temperature and have the fireplace automatically adjust its output to maintain that temperature. Some models feature flame height adjustment‚ giving you control over the visual intensity of the flames. Additionally‚ some remotes include blower control‚ enabling you to manage the airflow and heat distribution from the fireplace.
Explore the settings menu on your remote to customize parameters such as temperature display (Celsius or Fahrenheit)‚ childproof protection‚ and thermal-safety shutdown settings. Consult the troubleshooting section if you encounter any issues while using these advanced features. Familiarize yourself with these options for a truly personalized and comfortable fireplace experience. Always check the appliance owner’s manual for additional information.
Warranty Information and Support
Warranty Information and Support
Ambient Technologies warrants its remote controls against defects in material and workmanship for a specific period‚ typically five years from the original purchase date. This warranty applies to the original owner and requires proof of purchase. The warranty covers repair or replacement of the remote control at Ambient Technologies’ discretion.
The warranty does not cover damage caused by misuse‚ neglect‚ improper installation‚ or unauthorized repairs. Batteries and other consumable items are typically excluded from the warranty. To initiate a warranty claim‚ contact Ambient Technologies’ technical support to obtain a return authorization number. You will need to provide details about the issue and your remote control model.
For technical support‚ consult the troubleshooting section of this manual. Additional assistance can be obtained by contacting Ambient Technologies directly. Their website and customer service line provide valuable resources for resolving common issues and obtaining expert guidance. Ensure you have your remote model number and purchase information readily available when seeking support.
Contacting Ambient Technologies for Assistance
Contacting Ambient Technologies for Assistance
Should you encounter any issues with your Ambient Technologies remote control that you cannot resolve using the troubleshooting guide‚ several avenues are available for obtaining assistance. Ambient Technologies is committed to providing superior customer service and technical support to ensure your satisfaction.
Firstly‚ visit the Ambient Technologies website. The website hosts a comprehensive FAQ section‚ troubleshooting guides‚ and downloadable manuals that may address your specific concern. You can also find contact information for reaching their customer service team via email or phone.
When contacting Ambient Technologies‚ be prepared to provide detailed information about your remote control model‚ the specific problem you are experiencing‚ and any troubleshooting steps you have already taken. This will help the support team diagnose the issue and provide you with the most effective solution. If possible‚ have your proof of purchase readily available‚ especially if your remote control is under warranty.
Alternatively‚ you may contact their technical support line‚ where trained professionals can guide you through troubleshooting steps or provide instructions for returning your remote control for repair or replacement‚ if necessary.